Scanning Photos – Knowledge Base and FAQ
An encyclopedic, comprehensive knowledge base & FAQ of Questions and Answers on scanning photos, editing metadata and organizing digital photos.
General – Before You Begin
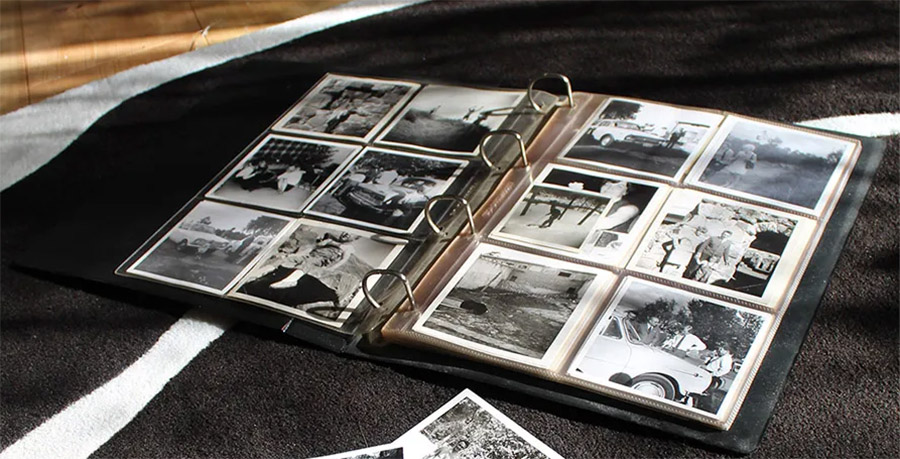
Gather all photos – loose, framed, and in albums. Ask your relatives for photos that they have but you don’t, and borrow those with a promise to provide digitized, organized photos in return!
Sort photos into lots by years or decades, and then (if possible) dates. Leave out all unremarkable, duplicate and near duplicate photos.
Take stock of what equipment you have: a desktop scanner, a DSLR or other digital camera, or a smartphone? Scanning tips and workflow for each of these are provided later in this FAQ. Below is the overall workflow for your photo scanning project:
The best photo scanning method depends on your needs. Flatbed scanners often offer the highest resolution, but are suitable only for loose photos. Mobile apps are fast and convenient for scanning loose photos as well as albums, as they can scan, automatically crop and enhance photos in one step. Using a DSLR camera is best if you want RAW and TIFF format scans for post-processing.
You have four main options:
Professional scanning services: Send photos to a company that will scan and return the originals and digital copies to you.
DIY with an app: Use a photo scanning app on your smartphone to scan the photos quickly, add metadata and organize.
Scan with a DSLR or other high-quality digital camera: Similar to DIY, but you’ll need to crop and post-process (edit) the scans afterwards.
DIY with a scanner: Use a feeder or (preferably) flatbed scanner. It may auto-crop or you may need to crop, edit and organize later.
Doing it yourself at home is obviously cheaper than using a scanning service, but you’ll need time on your hands. If you already have a scanner or a printer-scanner and a computer with photo editing software, there are no additional costs. Or use your smartphone and a photo scanner app (most are under $10).
It depends on how many photos you have, whether loose or in albums, your budget, time available, and how you’ll use the scans. If thousands of loose photos, time (but not budget)-constrained, and needing archival-quality scans e.g. for large reprints or post-processing, use a photo scanning service. Otherwise do it at home with a flatbed scanner or smartphone.
To choose between these options, you need to weigh the convenience, quality, cost, and the risk (e.g. damage or loss in transit):
Scanning service: Costlier but convenient for large projects. Use high-speed, professional-grade scanners. Handle everything from start to finish. Usually accept only loose photos, not albums.
Doing it at home: Gives you full control over the process. Can be done fast using a smartphone and photo scanner app. For higher quality scans, use a flatbed scanner and image cropping software.
Depends on where you are located. It’s best to use a local service provider (less risk of photos getting lost or damaged in transit). In the U.S., Scancafe, DigMyPics and LegacyBox are three of the several established players.
Rate vary widely by country, specs and other factors. Almost all providers offer deals and promotions all the time, so look for those and genuine user reviews.
If you send photos to a scanning service, you should get the scanned plus original photos back in 10-15 days. Scanning at home with a flatbed scanner, cropping and editing may take about a week. With a smartphone app that scans and auto-crop multiple photos at a time, it may take 3-4 days.
Not recommended. If you take a photo with your phone, you’ll have to crop it manually. While this may work for 2-3 photos, a good photo scanner app is much more efficient as it will automatically crop, enhance and perspective-correct the scans. Some apps even let you scan multiple photos or an album page at a time.
Background Knowledge
High-resolution, compact JPG files are perfect for most users. Choose TIFF or RAW format (much larger files) only if you are an advanced user planning to do advanced editing or restoration.
You can’t scan photos with a flatbed or feeder-type scanner without first removing them from the album. It would be more efficient to scan these with a phone app or a DSLR or mirrorless camera. To use a DSLR camera, you’ll also need a tripod, a macro lens, and (optionally) a remote shutter.
With a desktop scanner, 300 DPI is a good balance of quality and file size – perfect for making standard-size prints, and easy to email or share on social media. Use 600 DPI to scan photos that you might want to enlarge and reprint. For film negatives and slides, scan at 1200-2400 DPI.
DPI or PPI is not relevant when scanning with a smartphone or digital camera. What matters is the total pixel count: e.g. iPhone cameras go from 12 MP up to 42 MP. Choose the highest resolution that your device offers.
DPI stands for Dots Per Inch, and describes the resolution of a printer. PPI is Pixels Per Inch, and it describes the resolution on a screen (e.g. computer, mobile device screen, or TV). All digital photos are made up of a matrix of tightly-packed-together pixels.
Here is how it works: A 12 MP digital image with 4:3 aspect ratio will be 4,000 x 3,000 pixels in size. This is good enough to make an 8” x 6” print at 500 DPI or a 16” x 12” print at 250 DPI – or to view it in full 4K resolution onscreen.
A flatbed scanner can scan multiple photos (or an album page) at a time at high resolution. It is suitable for scanning photos that are fragile, of varying sizes, or in albums. A feeder scanner can scan multiple photos stacked together. This makes it much faster, however, it is only suitable for uniform-sized, loose photos.
4K resolution refers to a display resolution of about 4,000 pixels width and 2,160 pixels height. It is also known as UHD (Ultra High Definition) or 2160p resolution. This is four times the pixel count of a Full HD 1080p display, resulting in much higher detail, clarity, and image quality.
Equipment for Scanning Photos
The equipment needed to scan photos depends on the scanning method:
– Flatbed scanner, computer, cropping/metadata editing software
– DSLR camera, tripod, macro lens, cropping/metadata editing software
– Smartphone or tablet, photo scanner app
Flatbed scanners often offer higher resolution than feeder-type scanners. They are suitable for scanning loose photos as well as albums. To scan loose pictures, place multiple photos on the scanner bed spaced slightly apart. Higher-end flatbed scanners may include an auto-cropping function, otherwise save the scans in a folder and batch-crop them with the Mac app SnipTag.
Feeder photo scanners are faster, and are favored by professional scanning services. They are suitable for bulk scanning same-sized loose photo prints, but cannot be used to scan albums or batches containing different print sizes. There is also a small risk of the photos snagging and getting damaged by their rollers, so it’s better to avoid these for rare or delicate photos.
When choosing a flatbed scanner, check its compatibility with your computer and operating system (e.g. macOS or Windows), resolution options (DPI), image formats supported (e.g. JPG, TIFF, RAW); speed, and bit depth (for color accuracy). Wireless and Bluetooth capabilities are nice to have. Check whether the bundled software includes automatic cropping and metadata editing (But don’t pay more for this – apps like SnipTag for Mac offer higher-precision cropping and powerful metadata editing features.)
If you plan to scan film negatives or slides, see if the scanner supports a slide adapter.
Key specifications for a film scanner include optical resolution (look for 2400 DPI or higher), high optical density, Dmax (for shadow detail), and color depth (ideally 48-bit, to capture shadows and contrast). The scanner should include frames or holders to hold multiple slides or negatives.
Other useful features are the ability to convert negatives to positives, and digital ICE to remove dust and scratches.
You can buy a decent home scanner for $150-300. These aren’t as fast and easy to use as photo scanner apps but offer higher-quality results, some can also scan slides and negatives. Canon’s CanoScan and Epson’s FastFoto lines include many good flatbed scanners.
For quick and convenient photo scanning, you could use your smartphone and a good app (e.g. Pic Scanner Gold for iOS, Google Photoscan for Android. Phone cameras and apps have become very advanced, don’t be put off by years old negative comments about scanning with them.
Use your smartphone paired with a good app. If you read on the internet that smartphone scans aren’t good enough, that’s obsolete advice. Desktop scanner technology hasn’t changed in three decades, while phone cameras and software have become incredibly advanced.
Another option is to scan with a DSLR, mirrorless or other high-quality digital camera.
Scanning with a digital camera (DSLR or mirrorless) can be faster and more flexible than with a flatbed scanner. You’ll need a little more equipment, some of which you may already have.
In addition to the camera, you’ll need a macro lens (50-100 mm focal length and 1x magnification), a tripod to mount the camera facing down, and a light box or LED lights for diffused indirect lighting. To scan negatives or slides, you’ll also need a back lighting source and slide tray.
Smartphone cameras have become incredibly good in terms of image resolution, sensor size and underlying software – while flatbed scanner technology has stagnated for decades. A recent model smartphone paired with a good photo scanner app is a great way to scan photos fast.
Smartphone Photo Scanners
Smartphone apps make scanning photos fast and easy – and the scan quality can be very good. Ignore naysayers, and consider this: flatbed scanners have hardly evolved over the past 30 years, while iPhone cameras have revolutionized photography and imaging over the past 15 years. Even a 12 MP camera can capture great scans, but current iPhones have 42 MP cameras. Good photo scanner apps use the full quality of your device, and can automatically crop multiple photos from a scan. They have many great features that flatbed scanners don’t, such as advanced editing tools, ability to add EXIF metadata, automatic iCloud backups etc.
The app should utilize the full resolution supported by your phone’s camera, and not reduce the resolution. It should automatically (and accurately) detect and crop the photos. Some apps can crop multiple photos scanned together – this speeds up scanning.
Privacy is a key consideration with personal photos, so check that the app does all the processing locally i.e. on-device, and doesn’t upload anything to the developer’s server.
Pricing is important: Look out for in-app purchases to unlock premium features, subscriptions, or limits on scanning and sharing. You should be allowed to save or back up your scans, albums etc. in a cloud service of your choosing (e.g. iCloud), not forced to use the app’s cloud.
A key desirable feature is image metadata (Date created, location, description etc.) The app should not only allow you to add metadata but also preserve it when you export the photos. It’s no use if dates/descriptions etc. are visible in the app but stripped when you transfer photos out of the app.
For more detailed guidance on choosing a photo scanner app, read this article.
Here’s how one scan containing multiple photos is cropped automatically:
Current iPhone and iPad models have 12-42 megapixel cameras. Scans with a 12 MP camera can be used to make high quality 12 inch x 9inch (or larger) prints. Most photo books are smaller than this. You can get high-resolution scans by following a few simple tips from this article.
The key here is lighting. Always scan photos in indirect daylight, for example near a window. Under electric light it’s very difficult to avoid glare, shadows and reflections – especially with glossy prints. Use diffused lighting. It doesn’t have to be too bright, most smartphone cameras can automatically compensate for low-light conditions. If you get glare or reflections in scans, moving a few inches or scanning from the other side of the table may solve the problem.
PhotoScan app gets you to take four photos from different angles and stitches them together to eliminate patches of glare.
Several apps are available for this purpose. In terms of features, quality and price, PhotoScan (Android) and Pic Scanner Gold (iOS) are excellent. Both apps speed up scanning with AI-powered auto-cropping, and include many useful old photos-related features.
How To Scan Photos
If using a flatbed scanner, carefully remove the photos from albums. Gently wipe the photos with a dry, lint-free cloth to remove dust and fingerprints. If the photos are curled, place them under a stack of heavy books overnight.
If you want to avoid having to take photos out of albums for scanning (and put them back in albums afterwards), use a phone app that can auto-crop multiple photos from scans, or a digital camera and a batch-cropping app.
Gather all photos and albums. Discard or put aside duplicates, blurry or other photos that you don’t need to scan. Sort the photos chronologically. If you don’t know the exact dates, sort by years or decades. Choose a file naming convention for scanned files. Many people like to prefix files with YYYY-MM-DD etc., but it makes file names long and clumsy. It’s preferable to add Date Taken in EXIF metadata instead. Also decide how you would like to organize the scanned photos, and on your computer, create empty folders (or folder / album hierarchy) accordingly.
Scan in a place with indirect or diffused daylight. Scanning under electric light isn’t recommended. Lay 3-4 photos flat on a plain background, spaced at least 2-3 mm apart. Hold the camera directly above and centered over the photos. Check that the image on your screen is focused, then click.
For more detailed, illustrated guidance, read this article.
To scan an entire album page at a time, use a smartphone app that can detect and crop multiple photos from a scan. You can also do it with a flatbed scanner or digital camera, but then you will need a batch-cropping app to separate the photos.
Some desktop scanners’ software includes auto-cropping function. If your scanner lacks this, or if scanning with a DSLR or digital camera, try the Mac app SnipTag – it uses AI to batch-crop up to a hundred multi-photos scans per click. Details here. Another option: Photoshop’s Crop & Straighten function. Available for both Mac and Windows but can only crop one multi-photo scan at a time.
Phone apps such as Pic Scanner Gold, Pic Scanner and Photomyne automatically detect and crop multiple photos from a single scan. This can considerably reduce effort and speed up scanning if you have a lot of photos or albums to scan.
Conventional wisdom is to use descriptive file names (or variations of) names like YYYY-MM-DD_Event_Location_People_NNN, but these are long and unwieldy. A better option is to use Event_NNN, Location_NNN or People_NNN, then use an EXIF metadata editor to add Date Taken, Description, Location etc. This makes the scans readily searchable by all photo programs. Avoid special characters and spaces in file names. You may want to use the same prefixes as your folder names, e.g. save Christmas1996_008, Christmas1996_009 etc. in Christmas1996 folder.
Apple users can import the scanned photos into Photos on Mac, organize them in albums, then add Dates via Image > Adjust Date & Time, and Descriptions, Locations etc. PC users can use Google Photos or Windows File Explorer. You can do this for multiple photos at a time. Or you could use specialized tool that allows you to batch-edit all the details (including dates) in one place. Such programs include Adobe Bridge, SnipTag, and ExifTool.
Editing Scanned Photos
Some flatbed scanners and scanner apps can automatically remove such imperfections. For photos with more damage, use a photo editing program like Photoshop or a photo restoration app. If you lack the technical skill for this, try Facebook groups like this one (free, very good) or – for important photos – seek professional photo restoration help.
Three options: Professional restoration, photo restoration software, and AI-powered photo restoration apps.
Professional restoration services are the best option for badly damaged or priceless photos. For DIY restoration, photo editing software such as Adobe Photoshop has powerful tools like the Photo Restoration Neural Filter to automatically fix many issues, as well as many manual tools. If you are not tech-savvy, try AI-powered mobile apps or online tools to automatically fix common issues like fading, blurriness, and scratches. Popular apps include Remini, Fotor and YouCam Enhance.
Old photos may be faded, have color casts, or other imperfections like scratches, crease marks or water damage. Good photo scanner apps automatically enhance scans and correct perspective distortion. You may also use photo editing software on your computer or phone to adjust color, contrast, white balance and sharpness. This article explains how to correctly use the photo editing tools commonly found in mobile scanning and image editing apps.
Yes, to some extent you can fix slightly blurred photos after scanning them. Many online tools can “unblur” or sharpen images. Examples: Canva, Fotor, Picsart, and Topaz Labs. You can also do simple sharpening with Photoshop, Adobe Express and some photo scanner and photo apps.
Several AI-based tools are available for this purpose. Free and online tools include Palette.fm, Canva, PicWish and DeepAI. Desktop software includes Photoshop and Luminar. For smartphone apps, search in the iOS App Store or the Google Play Store.
If the area of glare is large, re-scan the photo. Minor glare problems can be fixed automatically with AI-tools such as PhotoDirector, Fotor and LightX, or manually with Photoshop.
Old photos can acquire color casts as the chemicals used in photo prints develop hues over time due to the action of elements. If you are a Photoshop user, Image > Adjustments > Levels > Grey eyedropper tool, or Image > Adjustments > Match Color > Neutralize to fix the problem. If not a Photoshop user, read this post for easy ways to remove color casts.

Organization and Preservation
You should have three (at least two) copies of your photos archive: One in a cloud service like iCloud, Dropbox or Google Drive; one in an external hard drive or SSD; and one on a Network Attached Storage (NAS) device or a separate SSD.
Once you scanned old photos, merge them with your more recent, digital photos, and organize them in digital albums. Store this digital archive in three (at least two) secure locations such as external hard drives and cloud storage. Store the original physical photos in acid-free plastic albums, envelopes, or boxes to protect them from light, moisture and dust.
When you take photos with a digital camera or a smartphone, it automatically embeds a lot of information into the photos, e.g. Date/Time Created, Location and camera info. This is invaluable for search and organization. For example, Apple and Google Photos use metadata to arrange photos by date. Scanned photos do not contain this information, so you need to manually add it using a metadata editor. This is very important. This article explains EXIF and IPTC metadata and how to enrich your scanned photos with it.
It’s a good idea to store your scanned photos in iCloud, because this makes them available on all your iOS devices as well as Mac. However, be aware that iCloud is a syncing service, not a backup – so, in addition to iCloud, you should also have an offline backup, e.g. on an external drive.
Another option is to save your scans in an iCloud Shared Album. This will allow you to access them from all your devices and easily share them with others. Shared Albums also don’t count towards your iCloud storage. See this article for more details.